Mastering geometric transformations starts with understanding how shapes grow and shrink. A scale factor worksheet for geometric dilation practice gives students the repetitive, hands-on work they need to grasp how multiplying coordinates or side lengths changes a figure's size without altering its shape. Without this practice, concepts like similar triangles and proportional reasoning become much harder to visualize and apply.
What exactly is a geometric dilation?
A dilation is a transformation that changes the size of a figure while keeping its proportions intact. You need two specific pieces of information to perform one: a center of dilation and a scale factor. The scale factor is simply the multiplier. If you multiply the dimensions by a number greater than one, the shape gets bigger. If you multiply by a fraction between zero and one, it gets smaller. The angles stay exactly the same, which is why the original and the new shape are always mathematically similar.
When do students actually use these worksheets?
Teachers usually introduce these exercises in middle school geometry or pre-algebra. Students use them when they first learn about similar figures, right before tackling more complex proofs or trigonometry. It is also the exact moment they start mapping shapes on a grid, which bridges the gap between basic arithmetic and algebraic graphing. Regular practice helps them internalize the rules of proportional scaling before moving on to advanced high school math.
How do you solve dilation problems on a coordinate plane?
When a shape is placed on a grid, the math becomes straightforward. Assuming the center of dilation is the origin (0,0), you just multiply the x and y coordinates of every vertex by the scale factor. For example, if a point is at (2, 4) and the scale factor is 3, the new point lands at (6, 12). Students who need more repetition can practice mapping points on a grid to build muscle memory for these coordinate multiplications.
What is the difference between enlargement and reduction?
The terms just describe the direction of the size change. An enlargement happens when the scale factor is greater than one, making the new figure larger than the original. A reduction occurs when the scale factor is a proper fraction, shrinking the figure. It helps to work through mixed exercises that focus specifically on identifying and calculating these size changes so students learn to quickly spot the difference based on the multiplier.
How does dilation affect area and perimeter?
This is where most students get tripped up. If you dilate a shape by a scale factor of 2, the side lengths and the perimeter both double. However, the area does not just double; it quadruples. The area scales by the square of the scale factor. Working through dedicated practice on how two-dimensional measurements change helps cement this rule before they encounter it on a test. For a deeper look at the educational standards behind these transformations, you can review the Common Core geometry guidelines for eighth grade.
What are the most common mistakes to avoid?
When working through practice problems, keep an eye out for these frequent errors:
- Adding instead of multiplying: Students sometimes add the scale factor to the coordinates rather than multiplying. If the scale factor is 2 and the coordinate is 3, the new coordinate is 6, not 5.
- Forgetting to square the scale factor for area: As mentioned earlier, perimeter scales linearly, but area scales exponentially. Multiplying the area by the base scale factor is a guaranteed way to get the wrong answer.
- Changing the angles: Dilation never changes angle measures. If a student draws a dilated triangle and the angles look different, the side lengths were not scaled proportionally.
- Ignoring the center of dilation: If the center of dilation is not at the origin, students cannot just multiply the raw coordinates. They must calculate the distance from the center point to the vertex first.
A quick checklist for your next practice session
Before grading or moving on to the next math topic, run through this quick list to ensure the foundational concepts are solid:
- Verify the center of dilation before touching any coordinates or side lengths.
- Check if the scale factor is a whole number (enlargement) or a fraction (reduction) to predict what the final drawing should look like.
- Multiply every single coordinate or side length by the exact same scale factor.
- Double-check that the angle measures remain identical to the original figure.
- If calculating the new area, remember to square the scale factor first, then multiply by the original area.
 Mastering Scale Factors with Guided Practice Exercises
 Coordinate Plane Scale Factor Practice Exercises
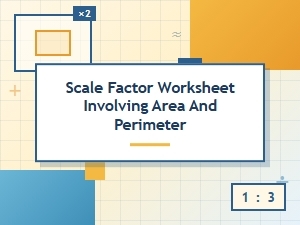 Scaling Shapes Worksheet for Area and Perimeter
 Practice Problems for Scale Factor Enlargement and Reduction
 Applying Scale Factor in Engineering Drafting Projects
 Architectural Scale Factor Worksheet for Practical Applications